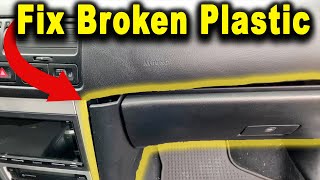
How To Repair Broken Plastic Car Parts
How To Repair Broken Plastic Car Parts
 With how much plastic is in cars, it’s only a matter of time before some plastic breaks in your car. In this video we use epoxy to fix the broken glove box in my R32 for about $10. Ive also been able to fix a few kids toys with the same method. You can also use washers, or even a paperclip to reinforce the repair. #DIYwtihDAP #humblemechanic
Clear Epoxy https://amzn.to/3oWDw2S
HD Epoxy https://amzn.to/38inrxE
Rubbing alcohol ~ https://amzn.to/34oYv6B
Q-Tips ~ https://amzn.to/38eBowA
Parchment Paper https://amzn.to/3aoz0Go
Paper clips ~ https://amzn.to/37y3YKp
Demel Tool ~ https://amzn.to/34pD458
Cheaper rotary tool option(UNTESTED) ~ https://amzn.to/3r3nZQy
Sand Paper ~ https://amzn.to/2LPW3zB
Micro Torch ~ https://amzn.to/2LJ2VP3
~~~~ Love the Show? ~~~~
Become A CrewMember ~ https://goo.gl/D7eROI
Patreon ~ https://www.patreon.com/user?u=4243029
Shop Amazon ~ https://amzn.to/2FQErAm
Audio ONLY Podcasts ~ https://goo.gl/5XcZxB
~~~~ Recommended Tools ~~~~
As an Amazon Associate I earn from qualifying purchases
Impact driver ~ http://amzn.to/2HsxS2H
Small Impact driver ~ https://amzn.to/2DZdsMN
Electric ratchet ~ http://amzn.to/2FydxMS
Magnetic tray ~ http://amzn.to/2FEpQ6g
Basic hand tools ~ http://amzn.to/2GnjF7K
Box wrench set ~ http://amzn.to/2FzoJch
ScrewDriver set ~ http://amzn.to/2FEjcgd
Shop towels ~ http://amzn.to/2FC7UgM
Allen Sockets ~ https://amzn.to/2GlcnAz
Torx Sockets ~ https://amzn.to/2pL0SfL
~~~~ Playlists ~~~~
Humble Mechanic Podcasts ~ https://www.youtube.com/playlist?list=PLwfzU5uvU-lKLEvGiyabJxxazND2S7lC-
Project White Wookie ~ https://www.youtube.com/playlist?list=PLwfzU5uvU-lJpDFuyOTudNRrlTdTRihqk
Failed VW parts videos ~ https://www.youtube.com/playlist?list=PLwfzU5uvU-lIxxNMAO-nNe4c3Liohrrr-
Tool and Product Reviews ~ https://www.youtube.com/playlist?list=PLwfzU5uvU-lKA_oaxAkY0KKTvS4cxuPA7
How To videos ~ https://www.youtube.com/playlist?list=PLwfzU5uvU-lKM-_ShLfG-IrNqklIp0_To
MK1 VR6 Swap Videos ~ https://www.youtube.com/playlist?list=PLwfzU5uvU-lKJ09uR9evf987LmSuijY-p
~~~~ Be sure to follow me at ~~~~
INSTAGRAM ~ http://instagram.com/humblemechanic/
FACEBOOK ~ https://www.facebook.com/HumbleMechanic
TWITTER ~ https://twitter.com/HumbleMechanic
Amazon Store ~ https://www.amazon.com/shop/humblemechanic
disclaimer:
The content of this video is available for informational and educational purposes only. It is not intended to be a substitute for the professional advice of a mechanic who has personally inspected your vehicle, nor does it create a relationship of any kind between the Humble Mechanic and you. Every situation may be different, and the Humble Mechanic does not make any warranties, whether express or implied, as to the accuracy, fitness, or applicability of the information or automotive parts portrayed in this video to any project and makes no guarantee of results. The Humble Mechanic and any sponsors of this video will not be liable for any damages related to personal injury, property damage or loss of any kind that may result from the use or reliance on this video and/or any automotive parts represented in this video. You are using the information and automotive parts portrayed in this video solely at your own risk.
STUPID BEAR ! LOOOK DIRTY !
Another good way to do this would be plastic welding. Just grab a soldering iron, melt the pieces together a little, then add in (melt) a zip tie and you’re golden. If you really care about the cosmetic result, you can also put a little aluminum tape on the front side and weld from the back!
Great video – thank you. I bumped the garage side with my mirror and broke a couple tabs holding the turn signal. New part would be $100, complete assembly $125. I’m going to try your approach to repairing the tabs! Thanks for the info and for showing the glue to use. Plastic adhesion is tricky – good to know the best glue.
Beautiful examples on the repairs, but with so many broken pieces, I’d have gone to a salvage yard, lol. Nice job!
Try taking an impression of the good tab with plasticine, putty or some moulding clay then push it under the broken side as a mould into which you can add resin with fibres.
New tech here and gosh these things r kicking my butt and gettn to me. Not matter how hard I try I’m doomed lol😅😅
Bravo complimenti
Ironic ive got a question regarding the mk4 glove box how can you straighten the part that hits the light switch mine is so crooked it annoys me that the light dont work.
My 3g eclipse 2000-2005 needs this the dash is broken everywhere
Some good ideas, but personally, I’d cut the back off flush and use the other one as a template, to make a new one out of plastic or ally.
this is what i need badly. Thanks so much 🙂
My wife used a similar method to fix a unsightly crack under her sink unfortunately when I stood back up it caused alot of pain and discomfort but to this day she stands by her decision. And I have to give her credit its still holding up
Makes me want to go out and fix things.
Never understood why do you call it a Q tip? Haha is that the real name or somthing I only know them as ear buds😂
Purdy cool. I have some of this kind-a work to do on a 1998 dodge B-350 van restoration.
TKS for the knowledge.
Subscribed. Love videos like this
This is one of the most useful videos I’ve ever seen on YouTube. Thanks for showing and explaining so thoroughly, sir!
Harika bir iş çıkardın
To repair a broken turning signal light plastic housing on my 86 Bronco I used the Oatley "All purpose cement" .It basically "welded" the parts together and the repaired housing looks like new…It also works great on repairing the plastic frame around headlights..
Great video thank u
my dear and bearded teacher, if instead of using cardboard and parchment paper to repair the glove box I had used plasticine, surely it would have been better… sincerely commander krazy glue hahahahahahahahahahahahahahaha
Cool techniques! Enjoyed watching this episode!
thank u for info
It cant be mentioned enough how important temperature is for working with epoxy. Ask me how i know. If you work with epoxy in a unheated workshop during the cold seasons it might never go off and you will have the worst day of your life.
Lol, I have just bought an old Golf MK4 and it amazes me how most of the car interior DIY´s I´m finding are from Golf MK4 owners
14:00 why is there a burn mark on the wax paper?
thankyou so much for taking the time to make this video this was a tremendous help!
Hey, Charles. Wondering if you’ve ever tried an epoxy or plastic weld repair on a MK5 tail light, specifically the clips that hold in the bulb holders. Those clips are under a great deal of tension since they compress the bulb holders against their rubber o-rings. I’ve already ordered a new light because I can’t see any repair being both strong enough and flexible enough to be as good as new. But, I’d still love to try to repair the broken one just to see if it can even be done. Let me know what approach you think would be best. Thanks.
@HumbleMechanic – if you like Epoxy you’ll love Plastex 😀
What type of spicy is it
that heated paperclip move is big brain
👍
Pretty sure you should be able to use modelling clay instead of the parchment paper to prevent epoxy flowing where it is not supposed to. Might be easier to work with, too.
nicely done video man! hats off to you
As an owner of an h2 with some flat out ridiculous prices for plastic pieces I thank you! Haha
I did a lot of plastic repair using super glue with a lot of epoxy reinforcement. I used ordinary plastic wrap to set the flat parts on, not caring if not all of the plastic wrap came off. To my surprise, none of the plastic wrap stuck to the epoxy.
awesome tips and tricks on fixing these breaks. I have an older Toyota tundra that has various cracked pieces and i cannot buy new ones…just not available. Now i feel that I can do this! Thanks man! New sub
Excellent video. Thanks for doing this.
Hey I have a mk4 gti 24v vr6 and wanted to fix my fitment but can’t go lower because of my oil pan being way too close to the ground, is there anything I can do to fix it?
Thanks for great tips for us backyard mechanics on a budget…🧔
Aaron Kaufman, is that you?
I was looking for instruction for replacing my door pins. Found 3 that impressed me, so I was going to go with one of those. 2 days later yours showed up as "suggested", and it smoked the rest. Now I will be checking your channel first, before the rest! Good job!
Great video. I have to pay more attention to this channel.
Designing and 3d printing plastic tabs and clips to epoxy onto expensive trim is a game changer
Thank you for your clip! Very informative and helpful
I hope this video inspires you guys to have a crack at fixing something before just replacing it. There are almost an infinite number of ways to fix this stuff… What is your favorite?
Vers cool repair 👍🏻👍🏻.. Why just buy a new one?
That’s great! Well done – Thank you so much.
After 26 hours the 5 minute epoxy is still tacky on the repaired section. If I put the panel in the car, next time I try to remove it it will have glued with the backing and rip off the plastic in pieces. 😡
We have a small hole and crack in our clear instrument panel cover. We can’t take the panel out as we’d have to remove the entire dash cover. Is there a way to fill in that hole with clear stuff?